All photos and text in this article
are copyright and property of The Coastal Passage. Reproduction
or publication without the permission is prohibited. This information is offered for private use only
and remains the property of The Coastal Passage.
The Original
NORSON SPLICE. Designed by the
author to be the simplist to learn and perhaps as strong as it
can be done.
"PRO SPLICE"
This splice was discovered by "reverse engineering"
when the author cut apart a splice done by a professional rigger
in the UK. It's simple and easy.
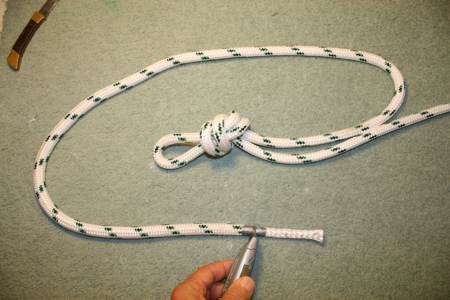
The new NORSON
DOUBLE SPLICE is designed to satisfy the most sceptical rigger
and sailor. A little more complicated but with double the graphics
to learn from, should be do-able even for the novice.
After investigating the
method that the pro's had used on my main sheet, this is a report
and instruction on their simpler method for making an eye splice
on double braid rope. THINK CHINESE FINGER PUZZLE!
UPDATE!
Before preceeding, get hold of the core
and pull it out the end of the cover for about 2 to 3 inches.
(50 to 75mm) Wrap some PVC tape tightly around the joint and
cut. This leaves you some extra cover material that will make
life easier when doing the last step. Also note the knot, this
one is a little to close to the work but I wanted to get it in
the photo. This prevents having to "milk" the cord
over a longer length. Recomend about 5 feet (1.5 metre) from
the end.
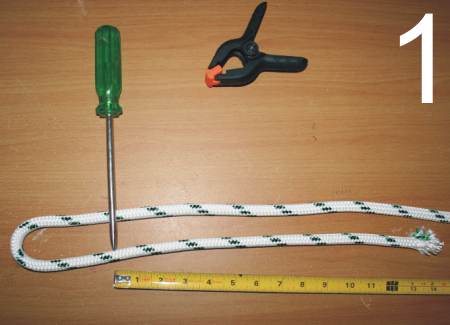
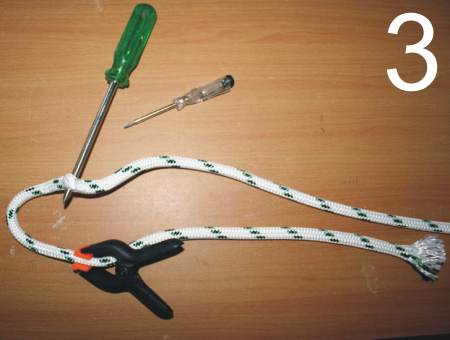
(1) My fid marks the location of
the join and the tape measure indicates how much of the core
will be removed. The amount shown is more than enough.
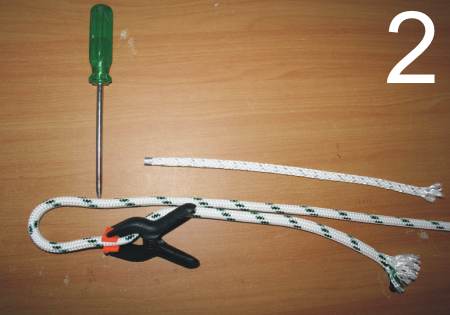
(2) The cover was pulled back and
the indicated length of core removed. I did this by putting tape
around the core where I wanted to cut then cutting through the
centre of the tape. It prevents unravelling. “Milk”
the cover back in place and fasten a clamp as shown or better
yet, use the gadget below to sew the core in place all around
where the clamp is shown in the photo. Then disregard the presence
of the clamp in the the instructions that follow.
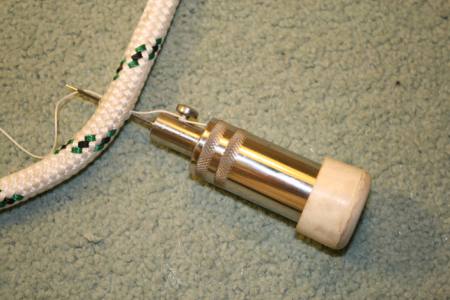
UPDATE
This tool allows you to do the new way
of securing the core to the cover. It is the "STITCH
IT AWL" made in the Whitsunday's by a cruiser of best
materials. Handmade of 316 stainless. Unbelievably handy and
cheap. No boat should leave harbour without one.
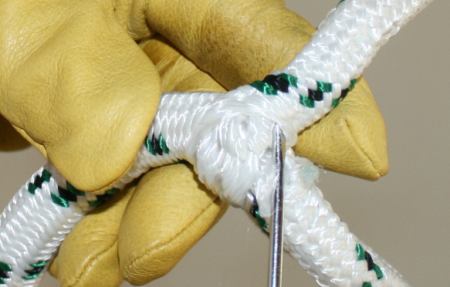
(3) Now part the weave of the cover
and push the fid under the core and force it out through the
opened weave of the cover. This is touchy. Be careful not to
pull strands of the cover out of place. A smaller tool may be
useful but mainly care, and in the case of old farts like me,
a powerful set of reading glasses can be used to advantage. This
step is easier when the cover is a dark colour.
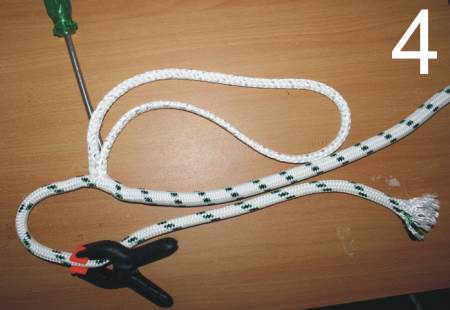
(4) Pull core out of the length
of rope, not the loop. Notice how the cover on the length of
rope becomes 'fat' as the core is extracted.
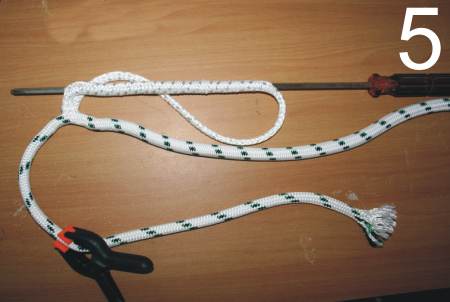
(5) A length of heavy wire would do this
job too but I seem to be a screw driver guy... what can I say.
Don’t you have a two foot long screw driver around? But
I digress. Stick your chosen tool up the middle of a section
of core a little longer than the length of excess cover you have
dangling out the other side of the loop. The weave of the core
makes this easier than you might think. The core needs to be
pushed together to "fatten" it to make room for the
tool in the middle. Leave about an inch or 30 mm from the join.
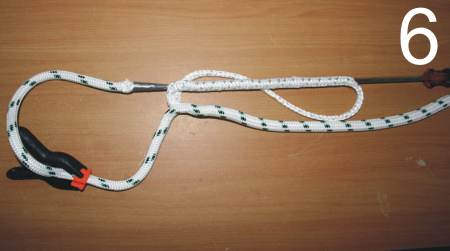
(6) Tape the loose end of the cover
to the tool as shown and....
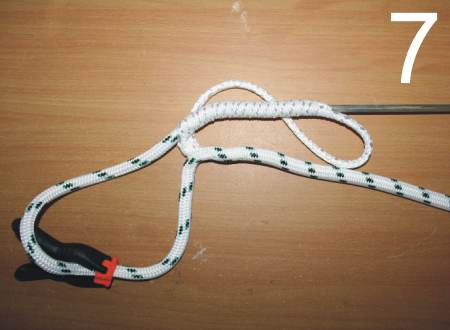
(7) start to gently pull the cover
through the core.
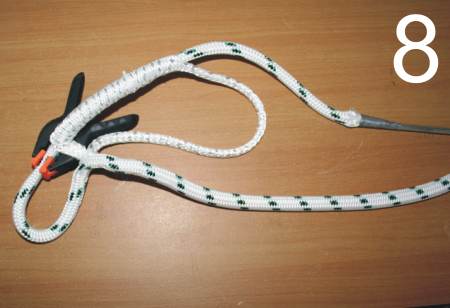
(8) Once pulled through the lengths
are uneven because the cover is stretched and the core is bunched
up.
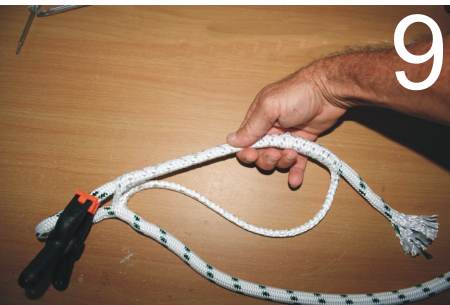
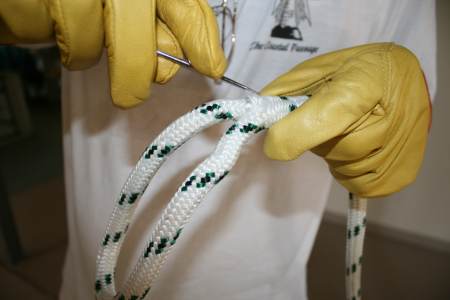
(9) So “milk” the core
back untill the cover which is now the core dissappears within
the former core. If you wind up with excess former cover hanging
out, either re-do the last few steps or just trim it off if it’s
not too much. But in any case you want it to finally look like
the photo in...
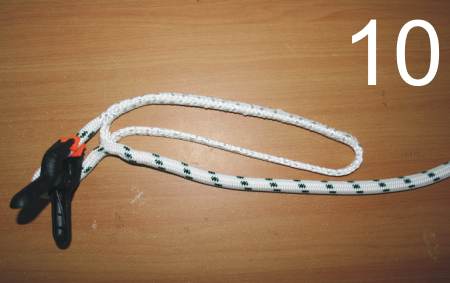
(10) Yup... thats what it is supposed
to look like. You can make the doubled core section as long as
you want it. Presumably the longer the stronger.
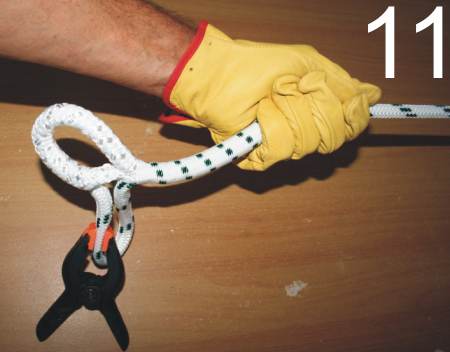
(11) “Milk” as with the
Norson Splice.
UPDATE
This last step was always bitchy. The
update at the top of the page should already help a lot but even
so.. the core can bunch up right at the end and rather than fight
it, a little screw driver can be used to poke under the cover
in the loop and pry it up using the bunched up core as a fulcrum.
Do this gently, all around and then milk again.
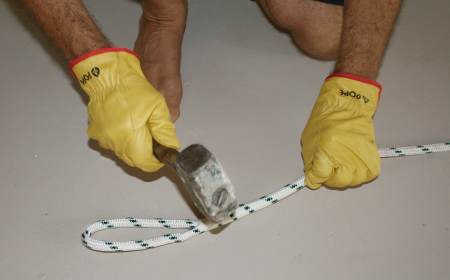
Then check the fit and do a little
more with the tool if required but if it is a little lumpy and
still resisting you...
a hammer (gently) on a concrete floor
does a great job of getting rid of the lumps and high spots. It compacts the core. Then one last milk..
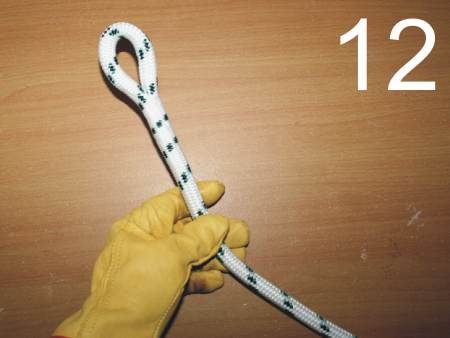
(12) Tidy and very strong.
And a little bonus..By cutting off the core in the loop on step
# 4 this method works to give you a perfect bitter end as well
You must note that all this is a method
in art as well as science. If it doesn't work well the first
time you have lost some time and a half metre of rope. Think
about it and try again.
Have a question, comment
or suggestion to improve the method? Email
me