|

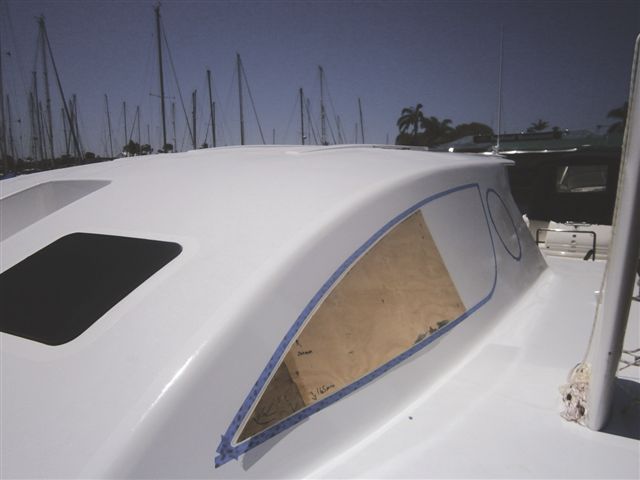
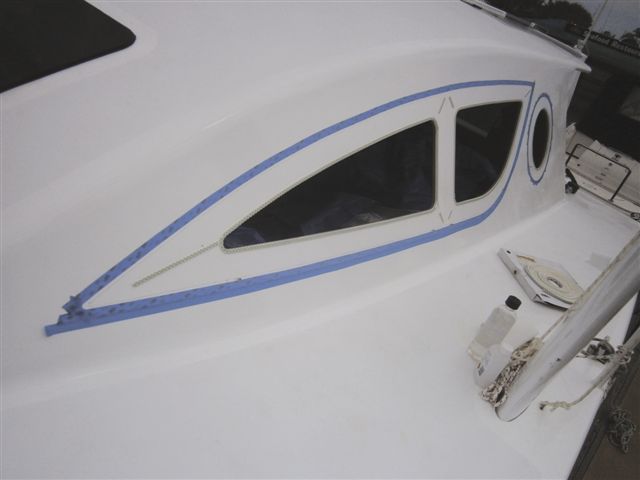
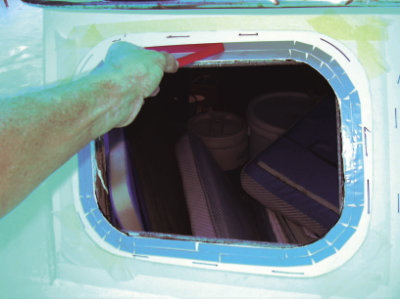
Masking off the window
and aperture. I also used the scalpel for trimming the tape around
the aperture but I have extensive experience with the tool. If
you cut through the paint system accidentaly, you may create
future problems. Another way to do it is to trace the window
outline around the aperature and manually apply the tape about
5mm or 1/4" outside of the line. This can be tricky business
on the curves and a narrower width of tape would help. Take time
to do this step as neatly as you can because it is the one that
makes the difference in appearance when finished. |
|
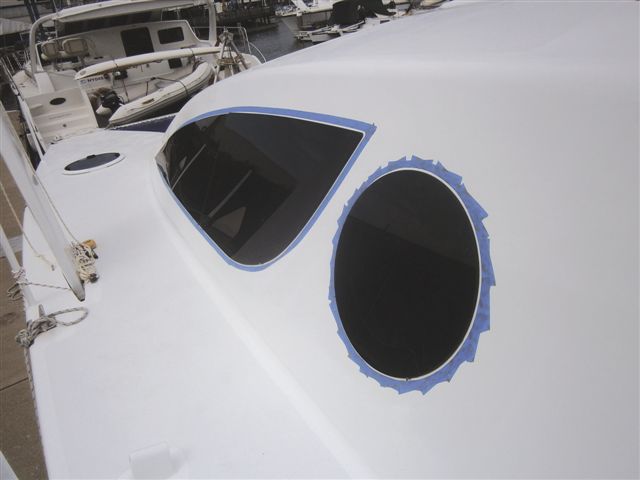
Apply tape and strip
off cover. The masking tape is applied to the boat in this photo
but it is hard to see. |
|
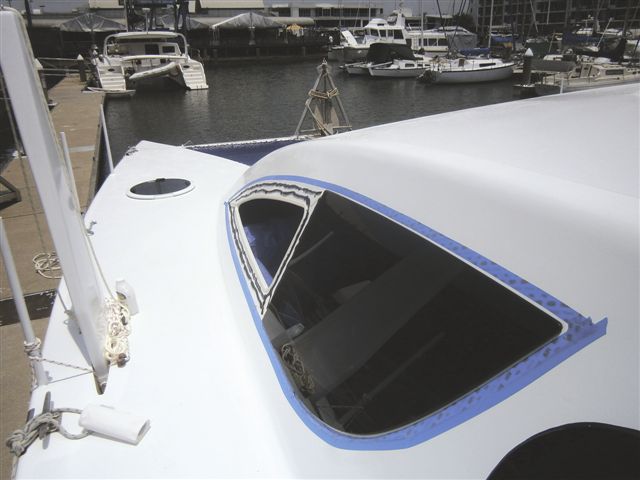
Apply sealent under
where the edge will be and get ready for the stressful part! |
|
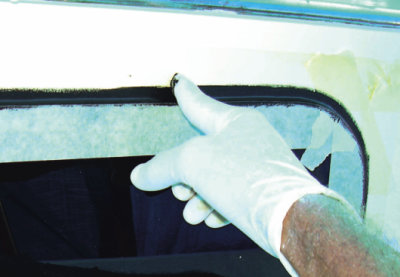
Apply a bead of sealent
all around, work it under and smooth off. |
|

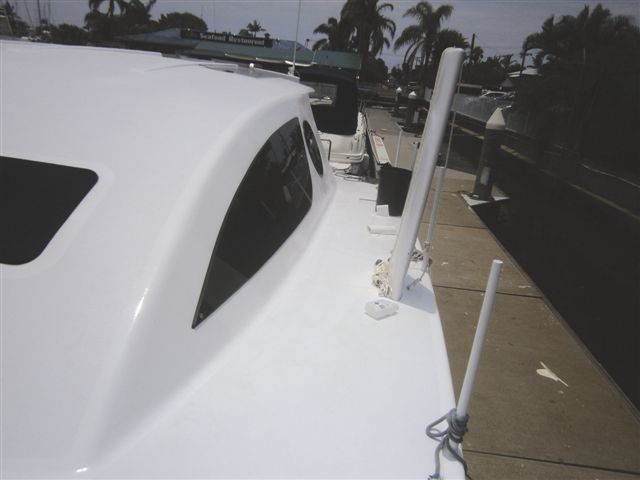
Carefully remove mask
imediately, pulling away from the silicone sealant. |
|

Done! |
|
|
In retrospect
and additional notes;
This was done a year and
a half ago and the windows have been perfect so far. (update;
have since sold boat so no more recent record available) Not
one drop of water has leaked but I would do a couple things differently
nonetheless. I think I would use only 1, 1/2" (12mm) width
of 3M tape this time instead of the double width that I did.
I was concerned about the strength of the bond but I think the
bond of the sealant is probably as good so I would increase the
area of sealant. Because of the fairing I did around the aperatures,
I wound up with a good thick bed of the sealant outside of the
faired area and under the edges. The thickness of the bed is
important. With the proper silicone I think a bed thickness of
2.5 to 3mm (1/8" + or -) for windows in the 300mm (1 foot)
square size is more than adequate. The larger the window, the
more the expansion, the thicker the bed and or width of area
of silicone required for success over time. Consult your supplier
for recomended thickness of plastic. I used 3/16" (4.4mm)
for the project shown. If using perspex/acrylic, I would have
increased that to 8mm.
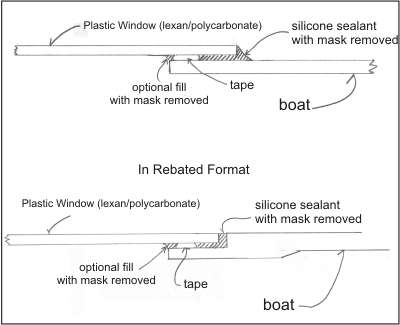
For those wanting to do
the ultimate job.... keep the two sided tape a little away from
the aperature and prepare a mask for the inside of the window
as well and apply sealant there to. (see above, "optional
fill") Mechanically, I think this may be overkill but in
some situations may be better looking and would keep contaminants
off the inside edge of the tape.
If you think you can handle
this project, expect to save thousands of $$$$ over the cost
of a pro to do it, if you can find one that will do it properly.
This is the favoured method of some of the premier production
boat builders in Australia and world wide. But don't tell anyone........
Notes
as of November 09; Was just on the phone with Allan Crabtree
in Cairns. He is working on his cat there and alerted me to a
problem you might want to watch for. He gave the local dealer
the stock number for the 3M tape in the article and he was given
the wrong item. Instead of 3M VHB 4991 which is 2.3mm
thick, he was given the similar but thinner variety. The 1.1mm
variety is more common but the right stuff is 2.3mm thick. This
difference could have a profound affect on the job. I don't know
what it is about Queensland but watch these people. The 1.1 thickness
is more popular with the auto trade to hold on trim so everyone
has it and they would rather sell what they have rather than
order what you need. Any shortcoming that occurs as a result
is a risk THEY are willing to take!
A note to add, if stuck
with the 1.1 mm tape, just use 2 layers.
ALSO.. though I prefer
the tape because I like the idea of having two systems at work,
it is quite common anymore to just use the silicone. You can
use any devise to create the gap between your boat and the plastic
to provide the required thickness in silicone bedding. Perhaps
some fairing compound in strategic positions, or just spots of
tape or anything at all. Self adhesive 'feet' for counter items
can be found in any hardware store that would work. To do it
this way you will need to mask the inside instead of it
just being optional, and you may need to invent some bracing
from the outside to hold the plastic in place while the silicone
is setting. Especialy if there is a curve in it. |
|
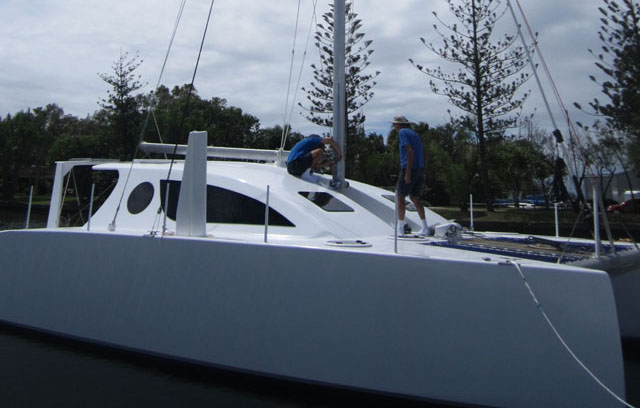
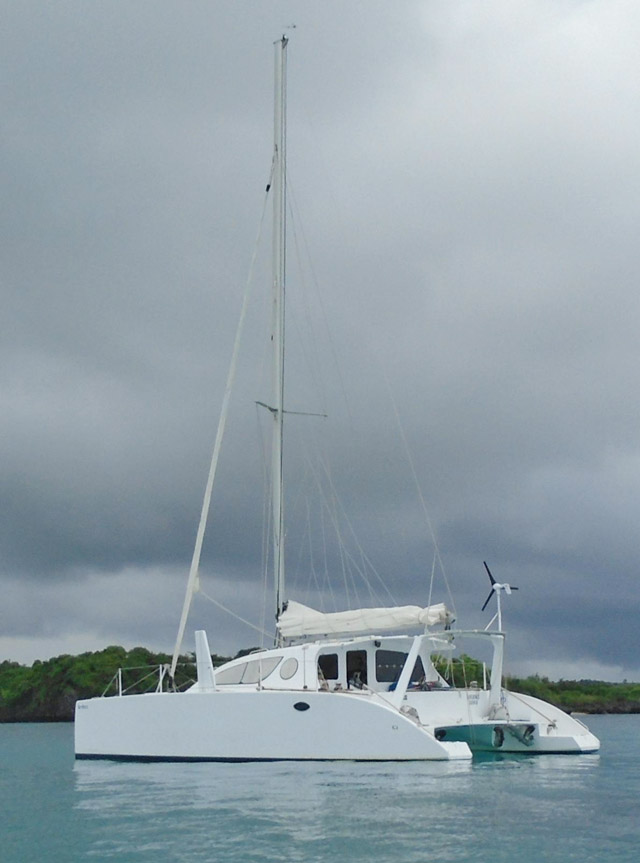
By Bob Norson
When we were rebuilding “WhiteBird”
some years ago, I was told that new boats were being made with
windows/ports held in with two sided tape and silicone. I was
replacing the old glass with polycarbonate but there was no way
I was going to use wimpy shit like two sided tape to hold her
together. In fact, there wasn't even enough screws left from
the aluminium bezels to satisfy so I went to work with drill
and tap and bought boxes of 5 mil screws…. about 500 all
up!
When finished it was a work of art and
admired by all, zillions of shiny screw heads holding the dark
tinted plastic against the neatly trimmed Black Sika Flex on
sparkling white painted sole and combing. The only thing worse
would have been a bunch of varnished teak!!
I got away with it for a long time because
I am always careful on boat work and fussy of finish but something
I've found about working on boats is this… PERFECTION IS
ONLY 90% EFFECTIVE!
Besides Sika Flex polyuerthane 291 not
being up to the challenge (not the best anyway) of sealing plastic
with the expansion tendency of “Lexan” (brand name)
or polycarbonate all those screws were an invitation to trouble.
Some were bound to leak over time and they did. On a plastic
boat that means you have a tiny leak. On a steel boat a tiny
leak means you have a big problem eventually. As the water penetrates
the sealant around the screw and begins to corrode the steel
behind the plastic, the expanding rust scale wrecks the sealant
against the plastic itself and … well you get the vicious
circle idea.
I had four things to do; first was to get
the plastic. The supplier I used has ceased selling plastic so
you are on your own to find a good supplier. Second was to repair
the paint system, which on a steel boat deserves a couple pages
of it's own. (See TCP # 27 for
the article) Third was to find the right sealant which wasn't
as easy as you might think but that is covered further along
in this article. Lastly to mount the windows without screws and
still make it look sexy….. the dreaded two sided tape
The window needs a relatively even surface.
Besides the mechanical issues you don't want "waves"
in your windows. If there is more than gentle curves involved
use Wattyl brand fairing compound (recommended) between the primer
and top coats somewhere to even things out. It's a two part epoxy
putty compound. Unless you let it go too long the stuff sands
fast and leaves a great surface. The fairing doesn’t need
to extend beyond the area where the tape will be. If the sealant
is a few mill thicker in one spot than another, no big deal.
The sealant hides the difference well. All the paints and the
fairing compound mentioned are products I have experience with
and believe are the best for the job. For low cost and expert
advise I recomend Whitsunday Ocean Services in Airlie Beach,
email, phone (07)
4948 1366. I have observed great disparities in price on these
materials.
So.. we all have an even surface to work
from now, with a firm substrate of paint or other durable, UV
resistant surface.
READY STEADY GO!!
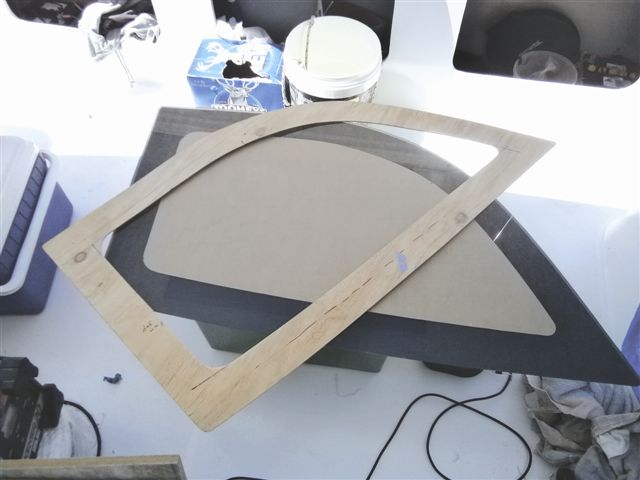
Cut your plastic to size leaving a 40mm
(1 ½”) overlap (some say less but I work on the “safe”
side) for your tape and sealant. I used a metal cutting blade
on a jig saw running at moderate speed with good result. A less
than perfect cut can be straightened out with a belt sander or
file or whatever but don't polish the edge as you want silicone
to stick to it later. Leave any plastic film in place on the
plastic and note that Lexan has an “in and out” side.
After cutting out I like to paint the area that will be the overlap
facing in. Either use the plastic film that came with it or mask
off with tape. I used a medical scalpel for shaping the film
for masking. Xacto brand knives should work as well. You can
get primers for plastic then coat with poly-U 400 but I found
automotive exhaust paint to be very tough and grippy on
the shiny plastic. (This was an insider trick I got from a lexan
disributor!) The actual paint I used was "Septone"
brand spray paint in a can. I recomend you test whatever paint
you intend to use on a smal surface, let dry and scrape and abraid
to insure good adhesion to the plastic. Painting on the underside
edges reduces UV that could get to the tape to degrade it and
hides all the stuff so it doesn't look ugly. (Lexan brand polycarb
is claimed to be UV proof anyway.) Black was the colour appropriate
for my application.
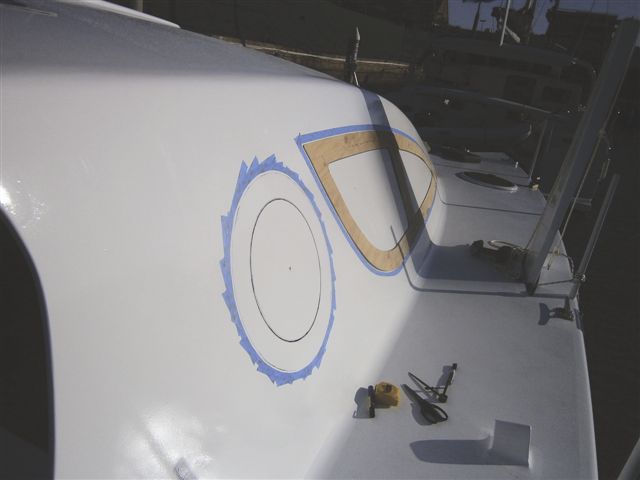
Next…. The very important task of
masking off the sealant can be done now or later. I chose early
because I wanted to apply the window with some sealant goohed
on the boat already. Some say that extra sealant isn't needed,
they squirt it in after the window is fastened with the tape
but I was worried about getting enough under the edge, so I did
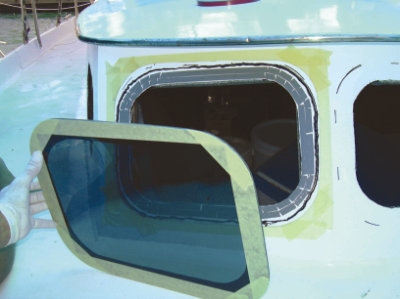
it this way. I put masking tape on the boat then held up the
window and used a divider to mark off a line about 5mm over the
size of the window. Once marked I carefully (so as not to penetrate
the paint surface) cut a line with my scalpel and lifted off
the excess tape. Now strip off all the plastic film or masking
tape you applied for the painting of the window and apply a mask
to the edge of the outside of the new window to protect it from
the sealant. I just laid it down quick and sloppy, then ran my
blade around the edge and viola.. done. (see first picture)
Next… 3M brand tape VHB
4991 is known to be very good. It comes in a roll, ½
inch wide by 100 feet (33metres) long and 2.3 mm thick! Make
sure you get the right stuff. Call 3M for more information,
136-136. This tape is used in the automotive industry to hold
those plastic panels in place on the side of many newer cars
(this info may help you find a supply). I used two strips of
½ inch to make the recommended 1 inch total (note that
I have revised the recomendation of the 1 inch width of tape
back to just 1/2 inch). Apply the tape to the boat toward the
inside of the 40mm overlap area.
Next……Now strip off the cover
on the two-sided tape and optionally (as I chose), squirt on
a line of silicone under where the edge of the window will be,
but not too close to the exposed tape surface. When the window
is applied you don't want the silicone to invade the tape. Raise
up your prepared window and carefully…..oh so carefully...
put the window in place. You only have one shot at this. If it's
wrong you are screwed, blued, stuffed and tattooed. Don't think
you can move and slide, you can't. It's either right or get out
the hammer and chisel. Assuming its right, use your palm to push
hard to really set the tape to plastic.
Now that you are considering that stress,
lets talk silicone! The right stuff is hard to find. You need
a silicone of the correct colour (black in my case) with a neutral
cure. If using Perspex you may get away with only a 20% + or-
joint movement capability. With lexan or polycarbonate you need
more because it's rate of expansion is greater. I found the right
stuff at “Lincoln Sentry” in Mackay. It is Dow Corning
brand, silicone # 791 with a whopping movement rate of
50%!. The Dow material is intended for the construction industry.
Those glass and steel office buildings use very large panels
of glass. Because of the size of the glass, they can expand a
lot and this silicone is intended to tolerate that. 3M also has
a sealant intended for use with Lexan, consult your local dealer.
Normal polyurethane sealant is not up to the job. Your Sikaflex
291 may hold for a while but sooner or later the expansion of
the polycarbonate will overcome the adhesion and it will start
leaking. A very thick bedding of the sealant will slow it down
though.
Next…. If you haven't already, mask
off the outside now. (about 5-6mm from the edge of the plastic
on a flat surface or to the edge of a rebated surface) Squirt
a line of the silicone all the way around the outside edge. With
a rubber glove covered finger, work the silicone into and under
the edge of the plastic and finally smooth off the whole way
round. Don't leave any holes or rough spots. Now carefully pull
off the tape. Don't wait till it starts to set. Get all the masking
off now. The silicone will skin out in a couple hours but you
should give the project 72 hours before you abuse it. Rubber
gloves are cheap at the supermarket so use plenty of em. Keep
a bottle of methylated spirits and paper towels handy to wipe
up the stray accidents.
DONE!I thanks to:
Brad of Blue line Boat Builders, Mackay. Brad got me started
and even loaned some supplies. Thanks Brad.
Ian Cambell of “Vega 1” for tips on masking.
Brett of “Imagine” for general info and advice on when
to remove masking.
Graeme of “Katani II” for the methylated spirit trick. |